Some might think the process is aggressive so they might wonder “How do you perform infant CPR safely?”. According to a study from the American Heart Association, infants and children are less likely to survive an out-of-hospital cardiac arrest than teenagers. In addition, the observed survival patients showed a less favorable neurological status.
The AHA states that this is the perfect opportunity for pediatric caregivers but also parents and bystanders to educate themselves on CPR for younger children, especially infants, as the most vulnerable demographic.
In order to raise awareness about infant CPR and its importance, this article will discuss the main difference between adult and infantile CPR, how infant CPR looks, and key steps to remember.
The Difference Between How to Perform Infant CPR and Adult CPR
CPR means cardiopulmonary resuscitation or a rescue procedure that mimics blood pumps that deliver to the rest of the body. It is performed when a person’s heart, regardless of age, stops beating. Neonatal resuscitation refers to CPR given to a baby.
However, given that an infant or baby’s musculature, body, bone density, strength, and physiology are less developed than an adult, performing the infant CPR procedure is slightly different than that of an adult.
Namely, the changes are adapted to the infant’s strength, as you will see shortly. If a person performs adult CPR on an infant, it may cause more harm than good.
To avoid causing pain to the baby, it is crucial to learn how CPR is done correctly and to pay attention to the details. The paragraph below elaborates on the proper infant CPR.
How Do You Perform Infant CPR Step by Step
Performing Infant CPR is by all means, stressful. Every doctor, professional babysitter, or caregiver who has gotten CPR certification training and administered infant CPR at least once can confirm that.
We mention this from the beginning to mentally prepare the person interested in learning infant CPR. After all, being able to control themself and focus entirely on CPR can be very difficult when an infant is involved.
Taking deep breaths and focusing on your breathing during CPR always helps to calm you down and settle your thoughts. Therefore, deep breaths will be the first step to infant CPR. As for the procedure, we followed the Red Cross example as one of the most trusted institutions.
Before You Perform Infant CPR
When babies enter cardiac arrest, they become unresponsive to the environment. And since they cannot communicate with their surroundings, it is your duty to check up on them to find out what is going on.
One way of checking for an infant’s responsiveness is by shouting their name or any word they might recognize by that age. Make sure that you raise your voice enough to get their attention, if possible. If the baby is still unresponsive, you need to tap the bottom of the baby’s foot, shout their name, or “mama” and check for any leads on what makes them unresponsive. There may be bleeding or other life-threatening external traumas.
Mind that this step lasts only 10 seconds, and prolonging it could mean a difference between life and death. If you cannot find out what put the baby in that position, there is a chance that they are undergoing cardiac arrest. In this case, you must begin and perform the infant CPR.
Additionally, before you begin CPR, call the ambulance or get someone else to call them. The baby must be checked by a medical professional for further treatment.
Step 1: Adjust Your and the Baby’s Position
The first step involves finding a firm surface where you can lay down the baby and perform CPR. Remember that the surface must be firm and flat otherwise; the procedure may not work.
The person who is going to perform infant CPR to a baby may stand or kneel beside the baby with their legs slightly opened.
Step 2: Begin With 30 Chest Compressions
Once you ensure that the baby is in a good position, you must start doing the compressions. This will help restore normal blood circulation.
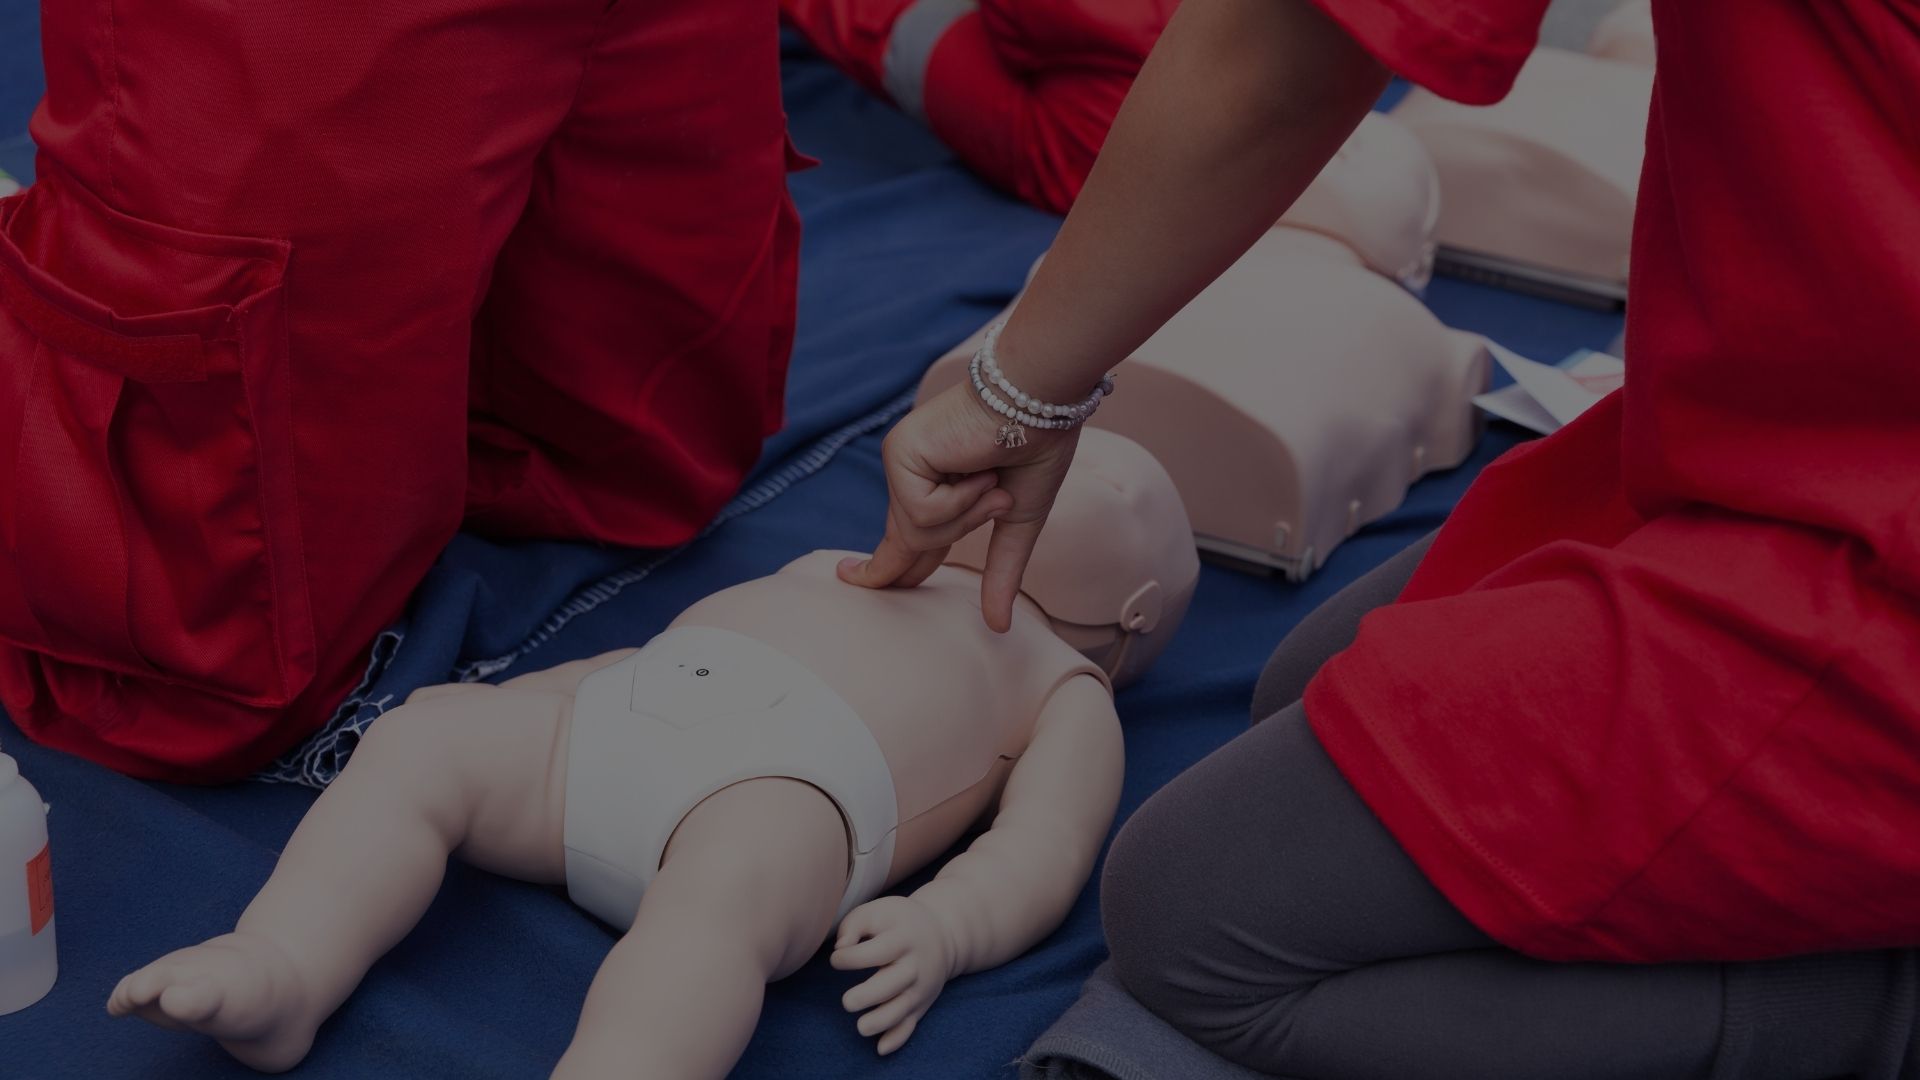
Firstly, you will have to put both of your thumbs side-by-side in the center of the baby’s chest. You will place them right below the nipple line. With your other fingers, wrap the infant’s chest towards the back for better support.
Then, begin the compressions using your thumbs to push down hard and fast. Make sure you’re pressing no more than an inch and a half into the chest. The rate of compression should not be below 100 or over 120 per minute.
Mind that you must wait for the chest to return to normal in-between compressions. This step is very important, and you must follow the chest movement all throughout.
If you find the thumbs position difficult, use the two-finger technique. Basically, it is the same technique with a slight variation. Instead of placing your thumbs, you need to put your two index fingers in the center of the baby’s chest and below the nipple line.
Note: If you cannot achieve an inch and a half depth, use only one hand while you perform infant CPR.
Step 3: Provide Rescue Breathing
After the 30 compressions comes another vital element of infant CPR, which is giving 2 breaths.
First, you need to place the baby in a neutral position but ensure the head and back are aligned. To correct the posture, lift the baby’s head by pulling its chin up and sealing its nose. Once you position the baby, you will have to blow the baby’s mouth.
Each blow or puff must be 1 second long, and it has to make the chest rise. If the chest does not rise after you blow into the baby, it means that the nostrils are not sealed. Repeat the exercise correctly and watch the chest rise.
Once you see the chest rising, you need to step back and allow the airway to remain open and the air to exit. You will know that the blow was performed correctly when you see the chest rising. That will also signal when it is time for the next blow.
Step 4: Continue With a 30:2 Ratio
You need to continue with the 30:2 ratio until the baby shows vital signs. Otherwise, the 30:2 ratio refers to 30 compressions and 2 blows. Usually, it takes 5 sets of 30:2 until the baby shows signs of life.
If the baby begins breathing or opens its eyes, turn it on its side and wait for the emergency response to come and check it for further examinations. However, if the baby does not show any signs of life after 2 minutes or continual CPR, you need to call the ambulance for more directions.
What Causes Cardiac Arrests in Infants?
While you may not always be able to assess the cause of cardiac arrest in a baby, it doesn’t hurt to know the possible scenarios. Since babies are very delicate, there are always risks of accidents that require medical intervention.
A baby may have entered heart arrest due to an injury or accident, such as a vehicle collision, drowning, electrocution, etc. Another external factor may be a hard blow to its chest.
There are also internal factors you should be aware of, such as congenital heart diseases or respiratory arrest.
Understanding How To Perform Infant CPR
Knowing how to perform infant CPR is vital for providing help to a baby in need, especially after an accident and when no guardian is present. Because permanent brain damage occurs only a few minutes after not breathing, it is vital to provide the baby with immediate help. This is why it’s great to take a CPR course to be prepared at any moment.
Make sure to follow every step of the procedure and do everything as carefully as possible. Remember that you must see the chest rise before doing another compression, and call 911 before starting so they can bring an AED and then transport the baby to the hospital.
Once you master the technique, you’ll be able to save lives.